How to Install Shutters: DIY or Professional Shutter Installation?
Homeowners often ask one question when considering shutters: How to install shutters? Should I take the DIY route, or is hiring a professional for flawless installation better?
This article will break down two critical options for installing shutters: DIY and professional installation. We’ll give you all the details you need to make an informed choice. By the end, you’ll know exactly how to install shutters that suit your needs, fit your budget, and align with your available time.
DIY, Really?
DIY installation offers an appealing way to save money. Yet, it demands a certain level of skill, proper tools, and thorough preparation. But, choosing a professional installation ensures a seamless experience. This option, though, comes at a higher price.
Shutters bring elegance and versatility to any home. They enhance both the appearance and functionality of a space. Not only do they offer aesthetic appeal, but they also provide practical benefits. These include improved privacy, better light control, and enhanced thermal insulation.
Section 1: Understanding Shutter Types and Installation Requirements

Before you install shutters, understand the different types and their specific installation requirements. Identify which type you’re working with. This knowledge will help you decide whether to tackle the project or call for professional help.
1.1 Types of Shutters
Different shutter styles come with unique features that influence how to install shutters. These include variations in materials, sizes, and mechanisms that affect both the installation difficulty and tools required.
Plantation Shutters
feature wide louvers and are a classic choice for many homeowners. Installation is simple if you have experience with DIY projects. However, custom-fit plantation shutters demand greater precision. In some cases, hiring a professional is the better option.
Traditional Raised Panel Shutters
are made of solid materials and provide a more robust look. Due to their weight and intricate panel design, they require more detailed installation. The complexity of installing shutters of this type often leads homeowners to consider hiring professionals.
Tier-on-tier shutters
consist of two separate panels that you can open independently. Installing tier-on-tier shutters demands careful attention to detail and precise alignment. This process can be tricky for DIYers. It requires extra focus and skill to ensure proper installation.
Café Shutters
are Installed on the lower half of the window, allowing for privacy while letting light into the room. Their installation is often more straightforward than full window shutters. Hence, making them ideal for first-time DIYers.
Shutter Materials
Choose wood, faux wood, vinyl, or composite shutters based on your needs. Each material has unique weight and durability factors. The weight of the shutters plays a crucial role in the installation. Heavier materials, like wood, need extra support and stronger screws.
1.2 How Shutter Styles Affect Installation
The design and material of your shutters will influence how you install them. For example, plantation shutters often need a frame to be precisely measured to ensure the louvers open and close smoothly. With tier-on-tier shutters, more section means more hardware and time spent getting the alignment right.
Similarly, the material can affect the ease of installation. Wooden shutters tend to be heavier and may need stronger brackets, while vinyl shutters are lighter and easier to handle during installation. Understanding how to install shutters in relation to the material helps ensure that the process goes smoothly.
Section 2: DIY Shutter Installation

For many homeowners, installing shutters themselves offers the chance to save money. But, you must understand the work involved. Assess whether you have the skills and tools needed for the job. Let’s break down the steps for a successful DIY installation of shutters.
2.1 Advantages of DIY Installation
There are several benefits to choosing a DIY approach when learning how to install shutters:
- Cost savings: Install shutters yourself and save significant money. Professional installation costs will add, especially if you have many windows to cover. DIY installation offers a more affordable alternative.
- Sense of Accomplishment: Successfully installing shutters can be a rewarding project. Not only do you get to enhance your home, but you also gain practical skills in home improvement.
- Control Over the Process: DIY installation gives you full control over the process. You decide when to do the work, how much time you’ll spend on it, and which products and finishes best match your home’s aesthetic.
2.2 Tools and Materials Needed for DIY Shutter Installation
To begin, you’ll need a few essential tools and materials to help you with how to install shutters successfully:
- Measuring Tape: Accurate measurements are essential to ensure your shutters fit perfectly. Measure the window frame’s width and height to avoid mistakes later.
- Drill and Screwdriver: Drill and screwdriver are essential tools. Use them to secure the brackets to the window frame. Then, fasten the shutters firmly in place.
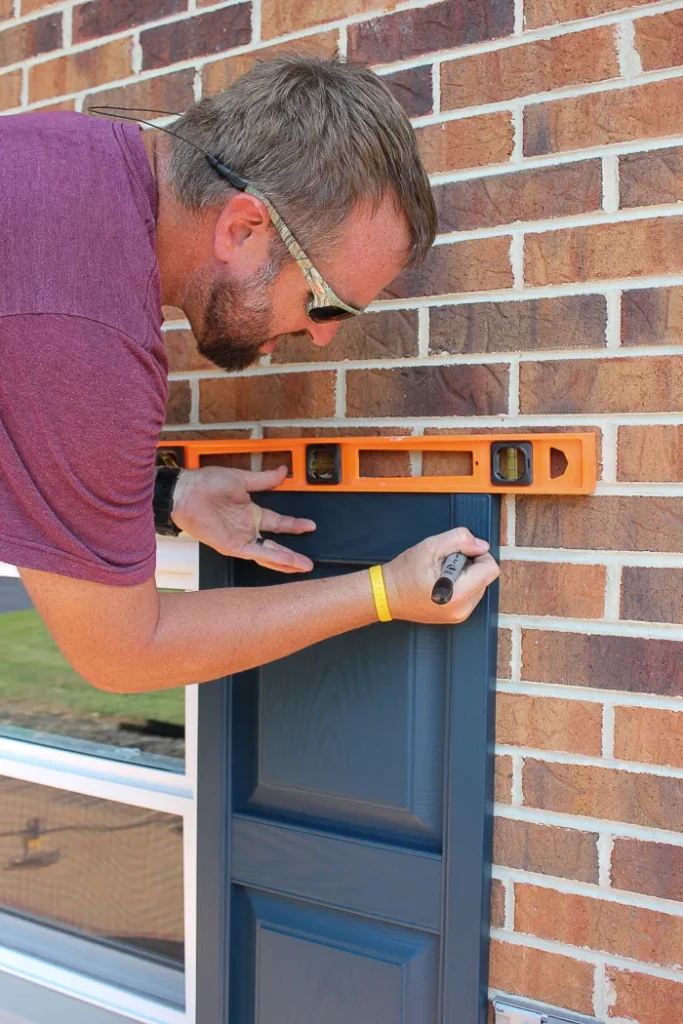
- Level: A level ensures the shutters are straight and properly aligned. This step is crucial for both the appearance and functionality of your shutters.
- Shutter Installation Brackets: These are designed to hold your shutters in place once they’re installed.
- Screws and Anchors: Depending on the material of your wall, you may need anchors to provide extra support when installing the brackets.
- Saw (if necessary): If you need to trim the shutters for a more precise fit, a saw will be required. This is most common with custom or adjustable shutters.
2.3 Step-by-Step Guide to DIY Shutter Installation
Here’s an easy-to-follow guide to help you understand how to install shutters yourself:
- Step 1: Measure Your Windows. Measure the width and height of your window frame at many points. Getting the most accurate measurements is essential, as even a tiny error can lead to a poor fit.
- Step 2: Prepare Your Shutters. Once your shutters arrive, make sure they are the correct size. If you’ve purchased adjustable shutters, check if they need trimmed or cut to fit your window. This step is essential to ensure the shutters align correctly when installed.
- Step 3: Mark Your Bracket Placement Using a level, mark where you want to place the brackets on your window frame. Ensure the marks are even and aligned to avoid crooked installation. This is crucial in ensuring the final result looks and functions correctly.
- Step 4: Install the Brackets Drill holes for your brackets, ensuring they’re placed according to the marks you’ve made. Use screws and anchors appropriate for your wall material to secure the brackets firmly.
- Step 5: Attach the Shutters. Once the brackets are secure, carefully attach the shutters. Ensure that the shutters are level, open, and close smoothly by testing them once they are in place.
- Step 6: Final Adjustments After installing the shutters, double-check their functionality. Adjust any parts that aren’t working correctly, and ensure the shutters sit securely in place.
2.4 Common Challenges of DIY Shutter Installation
Even though installing shutters yourself can be cost-effective, there are some common challenges to consider when figuring out how to install shutters:
- Inaccurate Measurements: Incorrect measurements are one of the most common mistakes. Ensure you measure twice to prevent the need for reordering shutters or making modifications.
- Alignment Issues: Installing shutters at the right height and level can be tricky, especially for larger windows or more intricate designs. Misalignment could affect the functionality of your shutters.
- Wall Material Compatibility: Some wall materials may need special fasteners or anchors. Ensure that the screws you use are appropriate for your specific wall type to ensure a secure installation.
Section 3: Professional Shutter Installation

Hiring a professional can ensure a smooth and flawless installation if DIY installation isn’t the right fit for you. Here’s what you need to know about professional shutter installation.
3.1 Advantages of Professional Installation
Choosing a professional installer offers several benefits. This might be the way to go when you decide how to install shutters. Professionals bring expertise, ensuring precise installation. They save you time by handling the setup. Their experience helps prevent mistakes that could cost you more later. Additionally, they offer advice on the best shutter options for your space.
- Expertise: Experts bring years of experience and the right tools to install your shutters. They pay close attention to every detail. This ensures your shutters look stunning and function perfectly.
- Time-Saving: Professional installation is faster. A DIY project may take hours or even days. A professional can finish the installation in just a few hours. This saves you time for other tasks.
- Long-Term Assurance: Professional installation includes a warranty. This provides peace of mind. You can trust that your shutters will last for years.
3.2 What to Expect from a Professional Installation
Hiring a professional means you don’t have to worry about how to install shutters yourself. Here’s what the process looks like:
- Initial Consultation: The installer precisely measures your windows. They recommend shutter styles and materials based on your preferences and window sizes.
- The installation: The installer will arrive on the agreed-upon date. They will bring all the necessary equipment. The installation process is likely to be completed quickly and effectively.
- Post-installation: Service is crucial. Many installers offer a warranty or guarantee. This ensures your shutters remain defect-free. They also provide maintenance if necessary.
3.3 How Much Does Professional Installation Cost?
The cost of professional shutter installation depends on several factors. These include:
- The type of shutters,
- The number of windows,
- The complexity of the installation.
You will pay between $200 and $500 per window for professional installation. This price does not include the cost of the shutters themselves.
Section 4: Making the Best Choice for Your Shutter Installation
Decide between DIY and professional installation based on your skills, time, and budget. Consider your abilities, schedule, and costs.
4.1 DIY vs. Professional: Which Is Right for You?
- DIY Installation: If you’re handy, gather your tools and dive into this project. Enjoy the process and take control of your home improvement. DIY installation is the way to go! It’s affordable, and you’ll gain the satisfaction of completing the project yourself.
- Professional Installation: Choose professional installation for a quick, hassle-free experience. Opt for this service if your shutters are complex or need expert handling. You’ll get precise results and save time in the process.
4.2 Budget Considerations
DIY installation costs less. Factor in any extra tools or materials you’ll need. Professional installation costs more, but it offers convenience and peace of mind. That added value may justify the extra cost.
4.3 Time Commitment
If you’re on a tight schedule, professional installation can be completed quickly. DIY projects can take much longer, especially if you’re unfamiliar with the process.
4.4 The Importance of Warranty and Quality
Professional installation includes warranties, ensuring your shutters work well for years. DIY installation lacks this security. Keep this in mind as you decide.
Conclusion: Deciding How to Install Shutters
Consider your experience, budget, and the time you can commit. When choosing how to install shutters, consider rereading this article too!
DIY installation can save money but requires preparation and skill. Professional installation, but offers expertise and a quicker, hassle-free experience.
The best option depends on your unique situation. Shutters will enhance your home’s appearance and functionality for a year! Choose the correct route.
